
Before we start to configure our decoys and put it in our production environment, let’s take a look at what exactly it is and how it differs from the usual honeypot. Honeypots are vulnerable systems configured to lure the attacker who is present in an organization. This attacker need not be from outside the environment. Many a times even employees tend to rome around in the network in order to see if they can find something interesting. This curiosity however can be harmful if not contained in a proper manner. Honeypots are something that are vulnerable with weak passwords, vulnerable softwares which lure the attackers, and once attacked; it does contain falsified information and databases to make it look real. On the other hand, decoys are not vulnerable. They are setup to lure the attackers, but they cannot be leveraged to gain access to the organization.
Decoys are configured in such a manner that when scans are performed on the system, it would look vulnerable but it is not. Thus an attacker would simply try to use exploits that work with the vulnerable software displayed in the scans, but those exploits won’t work, because the banners displayed in the scans are nothing but falsified information. When using a decoy, we do not want the attacker to gain access of the system, we just want to find where exactly the attacker is hiding. Once we have the IP address of the attacking system, or the credentials used to compromise the system, we then have an idea as to which systems and accounts are compromised. Thus we can then start to backtrack the attacker to the point where the attack actually started. Honeypots on the other hand wants the attacker to gain access to the whole vulnerable system. This is done so as to find what the attacker is actually looking for.
Installing the Decoy
We will be using OpenCanary to setup the Decoy along with ELK-stack to analyze the logs. We will be using a Ubuntu 16.04.2 minimal system for this. Firstly, create a folder named honeypot in the home directory of the server used. Download OpenCanary from https://github.com/thinkst/opencanary . OpenCanary is purely written in python. Once downloaded, perform the below command to install the necessary dependencies of python: –
$ sudo apt-get update

$ sudo apt-get install python-dev python-pip python-virtualenv wget curl samba build-essential libssl-dev libffi-dev libpcap-dev gcc g++

$ wget -c https://bootstrap.pypa.io/get-pip.py

$ python get-pip.py

$ rm get-pip.py

$ sudo apt-get -y remove ntp
Once the dependencies have been installed, we need to create a virtualenv for python and install all the required dependencies over there. So create a virtual environment on the folder honeypot that we created previously and install OpenCanary and its python modules:
$ virtualenv honeypot

$ source bin/activate #Activate the virtual environment

$ cd honeypot/opencanary

$ pip install opencanary scapy pcapy rdpy

$ opencanaryd --copyconfig
With the above commands OpenCanary is now installed and a new config file for the canary will be created in the home directory of the user with the name of ‘.opencanary.conf’. Remember that this is a hidden file. The logs of the OpenCanary will be stored in /var/tmp/opencanary.log. But this can be changed in the above config file. OpenCanary can be started and stopped with the below commands: –
$ opencanaryd –start

$ opencanaryd --stop
Configuration
OpenCanary can be configured to either look like a Windows System or a Linux System (irrespective of their version). We will be configuring the systems to look like Windows 2003 Server and an Ubuntu 14.04 Server.
Linux System
Below are the services that OpenCanary can run in a Linux distribution:
-
-
FTP Server
-
HTTP Webserver
-
Proxy Server
-
Samba Server
-
MySQL Server
-
SSH Service
-
NTP Server
-
VNC Service
-
Telnet
-
SIP
-
We will not be configuring all of them though. We will be only be configuring the FTP, HTTP, MySQL, SSH, SIP and VNC here. We are not concerned with NTP since our machine is not facing the Internet. The Proxy Server and the Samba Server will be configured in the Windows Decoy as well. We won’t be using telnet since we already have SSH in place and no administrator enables both of them on one single machine. However, all of these modules can be enabled or disabled from the opencanary.conf file in the home directory. Also, banner for each of these services can also be configured in the same file as well. Here is the config that is currently used for the OpenCanary service in a Linux Distribution.
Remember, that we have disabled TFTP so that we can get clear text username and password of FTP when someone tries to login. Reason being that if we know what username and passwords are being used, it would be easier for us to identify which credentials are being compromised. And if the passwords used are the wrong ones, it means the attacker is trying to brute force the system and the user is not actually compromised.
A Nmap scan of the above config looks like this:
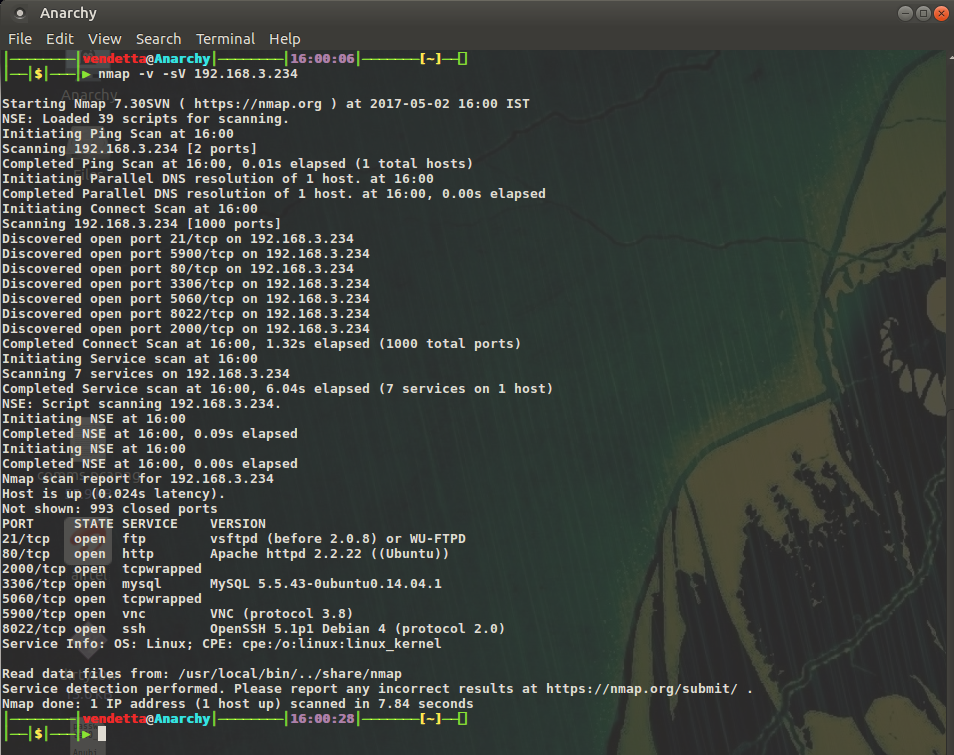
Each of these services can be queried as can be done in a real life scenario. We will later test out how these services generate logs for further analysis.
Windows System
For windows, we will be configuring the following services:
- RDP Server
- HTTP Webserver
- Samba Server
- MSSQL Server
Here is the config file for the windows decoy.
The above samba server can also be configured to look like Linux as well. Once the OpenCanary is configured, we also need to configure the samba config file in /etc/samba/smb.conf. Here is the config for the smb.conf. Make sure you have created a proper samba share and workgroup name as to the path mentioned above. You may need to change it according to the requirement. Once the Samba is configured, we need to configure the rsyslogserver for samba accordingly since OpenCanary generates samba logs based on the rsyslog logs. Edit the file /etc/rsyslog.conf and paste the below commands:
|
$FileCreateMode 0644 local7.* /var/log/samba-audit.log |
Below is a quick service scan run of nmap as to how it looks like to the attackers:
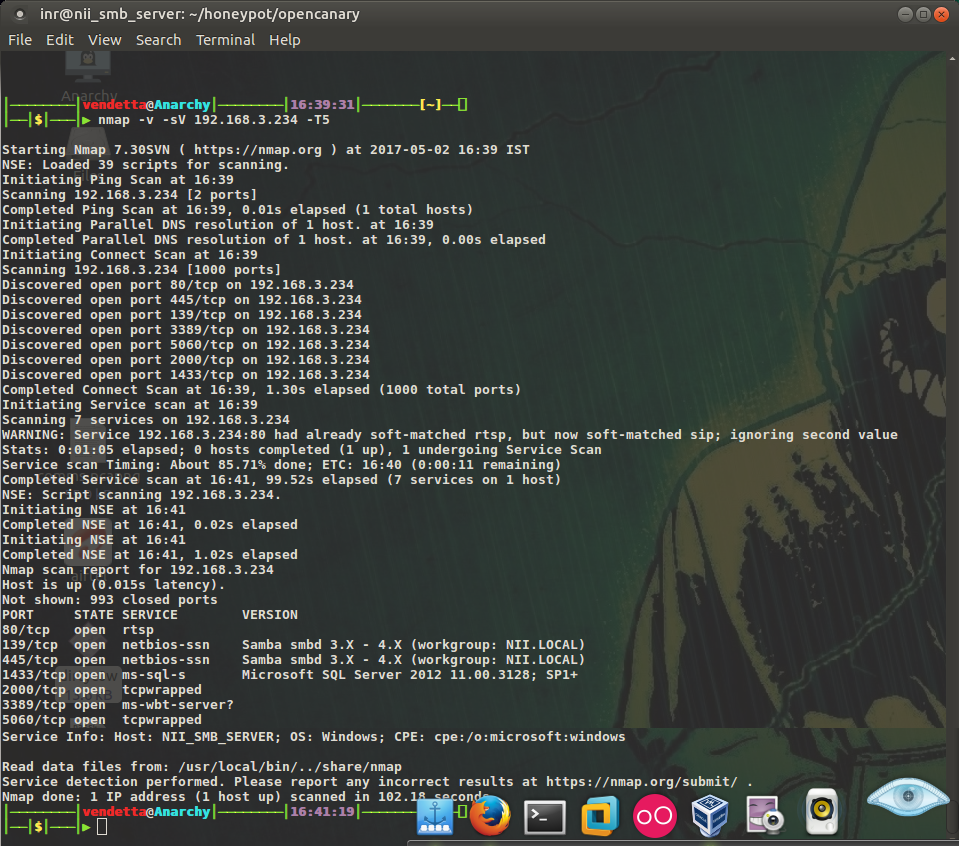
The Samba server can also be configured to query basic configuration:
Testing out the Decoys
To test out the decoys, we will attempt to connect to it using random username and passwords and do the analysis on our ELK Stack. This ELK Stack can further be configured with Elastalert – a plugin of Elasticsearch. This plugin can automatically generate alerts and send mails and text messages using Sendgrid platform.
All the logs will be sent via ELK-stack’s shipper filebeat to Logstash node. We will however have to write a JSON based parser since all the logs of OpenCanary are stored in JSON format in /var/tmp/opencanary.log. Logstash will enrich the logs and send it to Elasticsearch, where we will use kibana to visualize the logs and create dashboards.
To install filebeat on the Canary Server:
$ wget -qO - https://artifacts.elastic.co/GPG-KEY-elasticsearch | sudo apt-key add –

$ echo "deb https://artifacts.elastic.co/packages/5.x/apt stable main" | sudo tee -a /etc/apt/sources.list.d/elastic-5.x.list

$ apt-get update && apt-get -y install filebeat
You would however need to edit the filebeat.yml file in /etc/filebeat/filebeat.yml and change the logstash IPs as to where you want to send it and which logs to send. Once done, we can then head towards logstash to configure a parser for the JSON log. Here is the log parser for opencanary.log.
Change the ElasticIP to Elasticsearch IP and disable Rubydebug if debugging is not required. Save the above config in a file with a ‘.conf’ extension, for eg: canary.conf. Start the logstash with the below command: –
$ /usr/share/logstash/bin –log.level=info –f open.conf
The next step is to Analyze the logs properly in Kibana. Below is the screenshot of the visualization created in Kibana. To create a proper test case, I used a FTP credential bruteforcing tool written in python which you can find it here: –

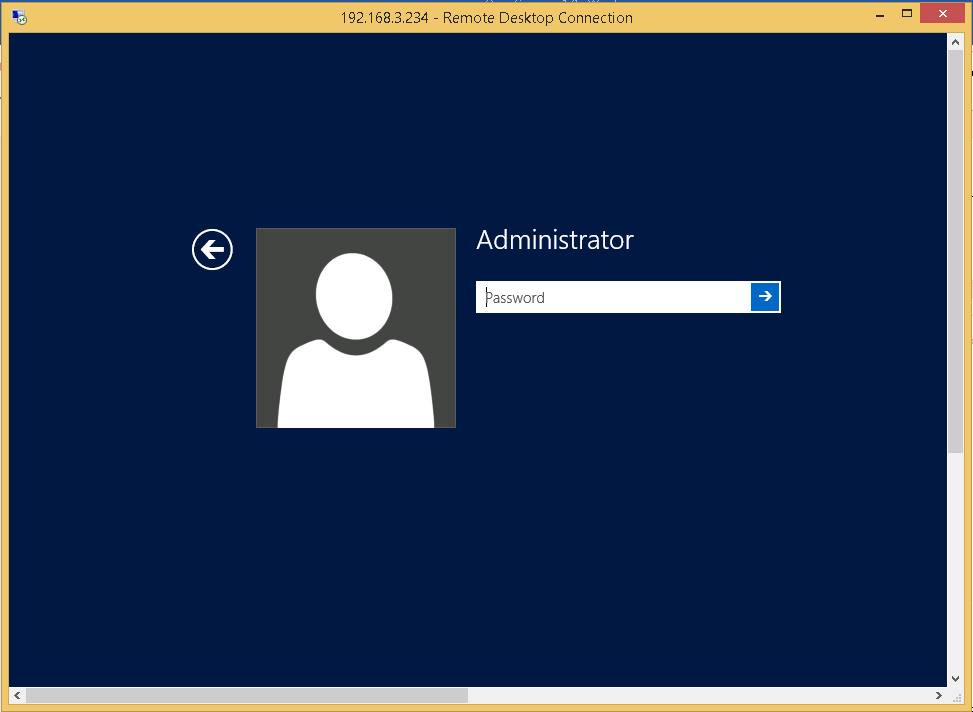
The above image shows the number of attempts made and the different usernames used above. It would work in a similar manner for SSH, Samba and other services. The RDP Configured on the Window’s decoy can also be connected and attempted for passwords(192.168.3.234 is our canary):
Chetan Nayak is a security researcher in Network Intelligence. He has a keen interest in Malware development, hacking networks, RF devices and threat hunting.
1